[Rubber] NetPBM – pamrubber


[download pamrubber]

Rubber Sheeting

I've been a long time fan of NetPBM, or as it was originally called PBMplus. Little over ten years ago Alex Lehmann and I co-developed pnmtopng / pngtopnm. Being a cartography fan, more recently I contributed pnmmercator, which converts to and from the Mercator projection.

The original reason to create this utility was for a completely different purpose, but in cartography there is often a need to "stretch" images. The term for this is "Rubber Sheeting". You provide some control points, pre and post, and the image gets streched around it. There are many applications that incorporate this feature, but I couldn't find a good one in the open source world. And definitely there wasn't one part of NetPBM.

Something that comes pretty close is pamperspective, which does a great job of converting an image in perspective projection back to a front facing rectangle. On the other hand, pamrubber is more of a "raw" utility, less dedicated and more versatile. You will need both, which one to use will depend on the job at hand.
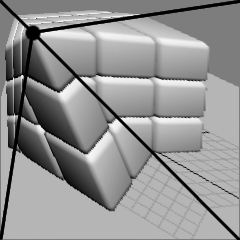
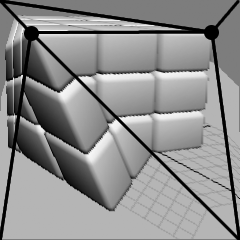
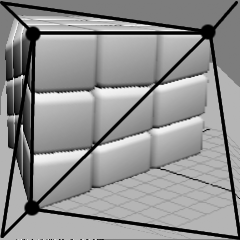
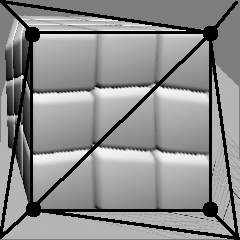
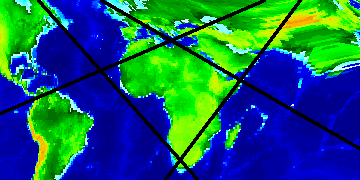


Tri and Quad Modes

There are two very different options to control the stretching that 'pamrubber' is doing. One is called "tri" and the other "quad".
  • In quad mode you provide two sets of four control points, that will function as "grid lines" for the old and new image. The result will be rather similar to what pamperspective can do, but without the correction for points closer or further away from the viewer.
  • With tri mode the image (pre and post) is cut up in a number of triangles and stretching will happen within those triangles. You can specify from 1 upto 4 control points. With a single control point it is like picking a pixel between thumb and index finger and then moving it slightly to another location. On the other hand with three or four control points, the focus is mainly on the conversion within those base triangles, and not so much on what happens between that and the perimeter of the image.

In all scenarios, the four corners of the image are used as additional control points, generating more triangles to fill the whole image.
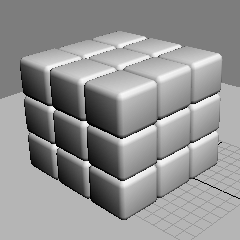
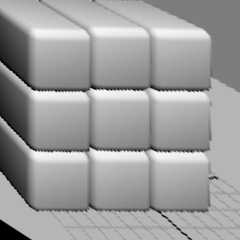
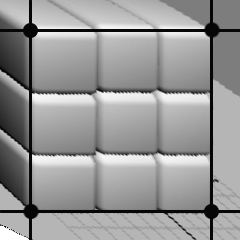


Control Points

Let's outline the various options you have with providing control points. As my sample image I use a simple 3D picture of a Rubik's cube.
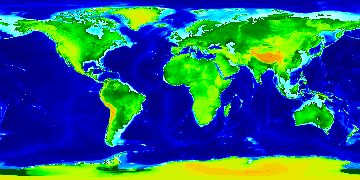
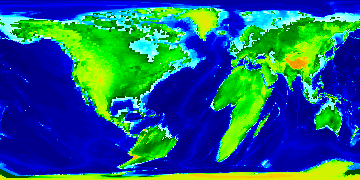
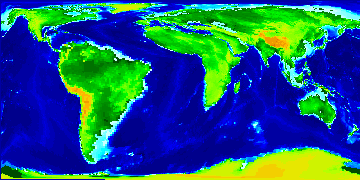
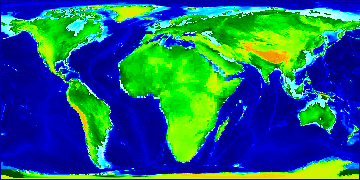
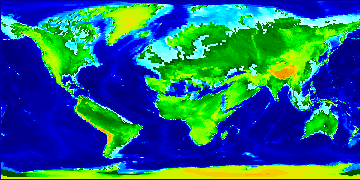
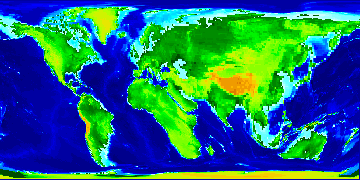
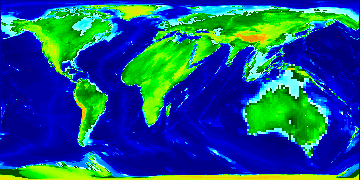
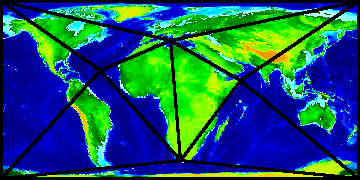
  • Starting Point

    rubiks-quad before    rubiks-quad after

    On the left the original image we're starting with. It's a Rubik's Qube in perspective. The image on the right shows it after processing with 'pamperspective'. Notice how the qubes are made "equal width" from left to right.

  • Quad mode - four Control Points

    rubiks-quad before    rubiks-quad after

    Now let's process the image of the Rubik's Cube with pamrubber in 'quad' mode. The before and after show an image stretch somewhat similar to what 'pamperspective' is doing. For the area outside of the four control points, extrapolation is done. Which will result in areas being cut off, or areas missing in the original image and filled with some default background.

  • Tri mode - one Control Point

    rubiks-tri1 before    rubiks-tri1 after

    This is the transformation that I described with "picking a pixel between thumb and index finger" and moving it. Triangles are created from the control point to the four corners of the image. And subsequently used for the transformation of the image.

    This also shows how straight lines that are crossing the edge of a triangle, will be broken at an angle. In photograhy type images, this effect will hardly be noticable. But in this test image it very much does.

    In this white paper on rubber sheeting you see the consequences of this characteristic for cartography.

  • Tri mode - two Control Points

    rubiks-tri2 before rubiks-tri2 after

    With two control points, it's like moving a line of pixels from the source to the target image. In reality it is creating various triangles from the end points of that line to the four corners of the image.

  • Tri mode - three Control Points

    rubiks-tri3 before    rubiks-tri3 after

    Three control points, forming a triangle, was the basis of this utility in 'tri' mode. All pixels within the triangle get stretched and transformed related to their position within the triangle. Outside of the core triangle, seven other triangles are created to cover the area between the core triangle and the four edges of the image.

  • Tri mode - four Control Points

    rubiks-tri4 before    rubiks-tri4 after

    Supplying the 'pamrubber' utility with four control points, results in using two connected core triangle as the basis. The example shows how this can be used to transform a parallelogram to a rectangle, but more irregular shapes are possible just as well. The surrounding area is covered with 8 additional triangles.


Changing the World

Here another example that shows how 'pamrubber' can be used to alter the map of the world by "blowing up" the continents.
  • World Map

    world normal

    These are the commands used to create the six transformed continents below. The source and target images are 360 x 180 pixels large.

          pamrubber 10 25 110 5 140 45 100 90
              5 25 180 5 210 60 130 150 world.ppm > namerica.ppm
          pamrubber 100 70 155 95 110 150
              50 30 170 60 90 170 world.ppm > samerica.ppm 
          pamrubber 150 70 200 55 230 80 200 120
              100 70 170 40 240 80 180 160 world.ppm > africa.ppm
          pamrubber 160 45 210 10 215 45 185 55
              120 70 210 5 240 70 180 100 world.ppm > europe.ppm
          pamrubber 225 15 355 25 290 90 225 60
              150 15 355 25 270 145 175 90 world.ppm > asia.ppm
          pamrubber 270 120 320 90 340 115 330 140
              200 120 295 60 345 120 315 170 world.ppm > australia.ppm
    
  • North and South America

    north america    south america

  • Africa and Europe

    africa    europe

  • Asia and Australia

    asia    australia

  • Tri versus Quad

    With the Africa image as an example, using the '-frame' option of pamrubber, you can show the control points of the target image. In 'quad' mode, the four control points are used to generate a coordinate system. In 'tri' mode the image is cut up in 4 to 10 triangles (depending on the number of control points) and then the pixels are transformed from a "source" to a "target" triangle. This transformation is a simple stretching based on the corners of the triangle.

    quad    tri


The Software

As of today, the source code for pamrubber is part of the "Advanced" tree of the netpbm package on SourceForge. It will take couple of months before it gets pushed into the "Stable" release.


[home] [pamwipeout / pnmblend] [Garp] [pnmtopng - part of NetPBM]


  Willem van Schaik, Calgary, February 2011     http://www.schaik.com/wwwillem.html